
Making an invoice can be hectic sometimes, but it's integral to running a business. Often, for small businesses, it comes with challenges that impact cash flow. According to recent studies, 39% of all invoices sent in the U.S. are paid late, with 61% of late payments caused by incorrect invoices. This highlights the pressing need to create clear, professional, and accurate invoices.
If you're wondering how to make an invoice in Word, Microsoft Word offers a cost-effective solution for business owners and freelancers, too.
You may be familiar with Microsoft Word as it is used for other tasks, but among its many features, it also allows you to create invoices. How? Read ahead and choose for yourself.
Key Takeaways
- 01Microsoft Word provides free, professional invoice templates that can be customized in minutes
- 02Follow 6 simple steps to create an invoice in Word: choose a template, gather information, customize, check details, save as PDF, and send
- 03Creating invoices from scratch in Word gives you complete design control and brand customization
- 04Word invoices are free and user-friendly, but lack automation and payment tracking features
- 05Dedicated invoicing software like InvoiceOwl offers automation, payment processing, and better tracking than Word templates
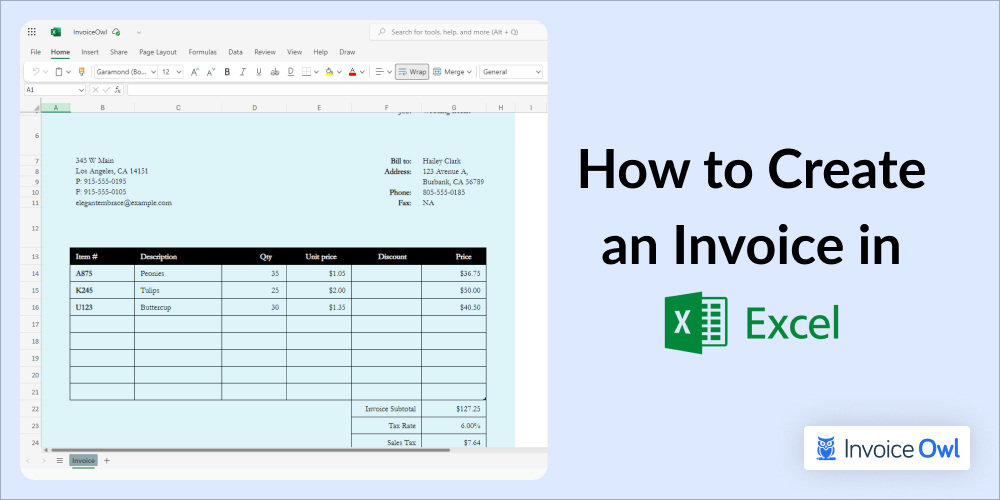
How to Make an Invoice in Word?
MS Word provides top-notch invoice templates that can simplify the process by auto-populating crucial fields and sections. Further, if you are using it for your business, you can quickly customize the document with your business and client details in just minutes.
To create an invoice in Microsoft Word:
-
Open Microsoft Word.
-
Click on 'File' followed by selecting 'New Document' from the menu.
-
A new blank document will open where you will enter Invoice into the search field, and Word will bring up all available invoice templates.
Here are 6 important steps to make an invoice in Microsoft Word
- Choose a Word invoice template
- Gather the information you need
- Create a customized invoice
- Check to see if any information is missing
- Save the PDF file
- Send the invoice
Step 1: Choose a Word invoice template
Creating an invoice in Word is easy. Select a Word invoice template that suits your needs before you begin.
Choosing a Microsoft Word invoice template allows you to customize it to suit your needs.

Open Word
Finding an invoice template is simple if you use Word online or on a desktop. Older versions also include free Word templates, so you don't need to upgrade just for this task.
After you have opened Word, you can now find the Word invoice templates.
Look for "invoice"
Type "invoice" in the search box on MS Word's first welcome screen.
After you select a Word invoice template, it will show you the list of best invoice templates. To find templates, make sure you choose to search "templates" instead of "recent."
Choose a Word invoice template
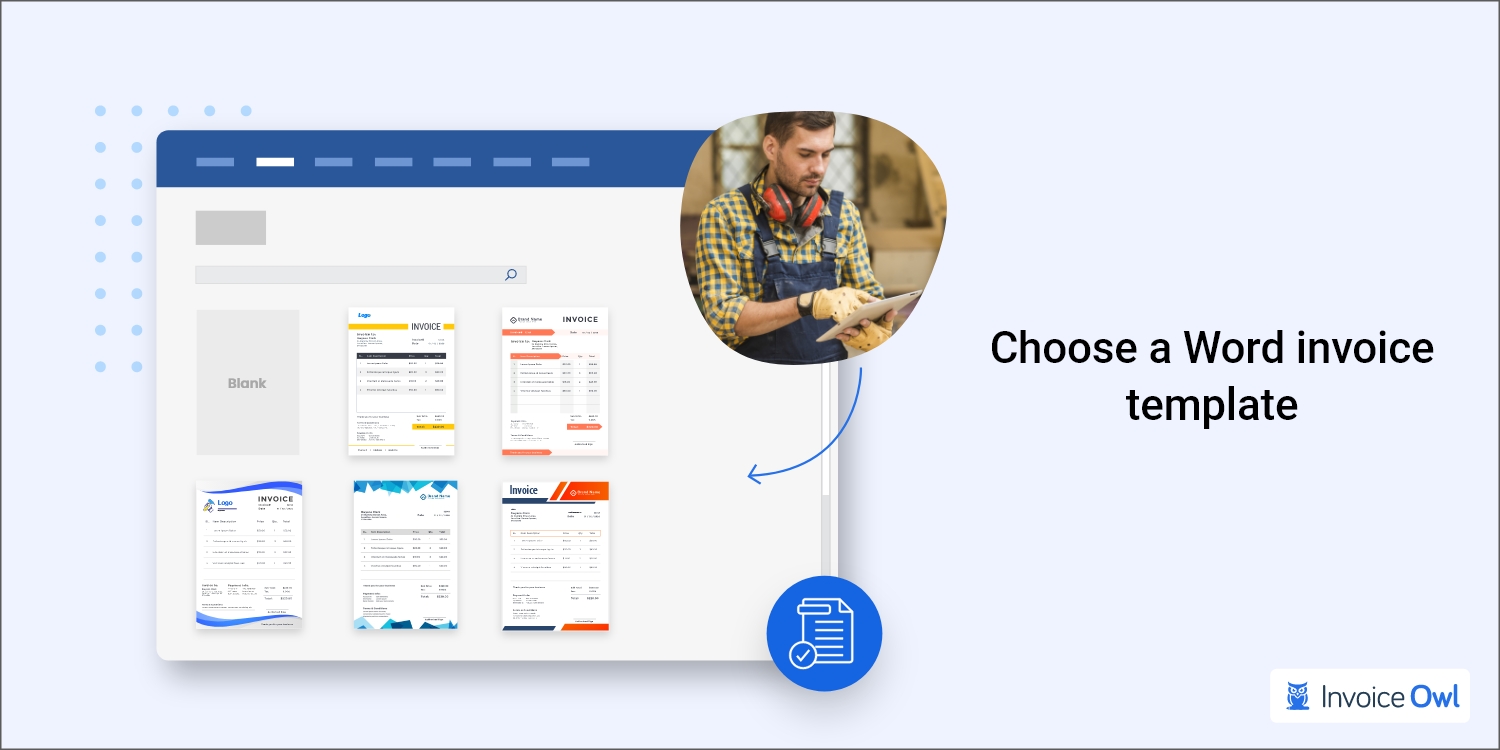
Choose your favorite Word invoice template and download them. The invoice will automatically download once you double-click it.
Step 2: Gather the information you need
Next, gather your invoice information to create your invoice.
You should search your proposal with the client's contact information and their business card, website, and email signature to find this information. Before you send your invoice to your client, you should have all the information you need to create the invoice in Word.
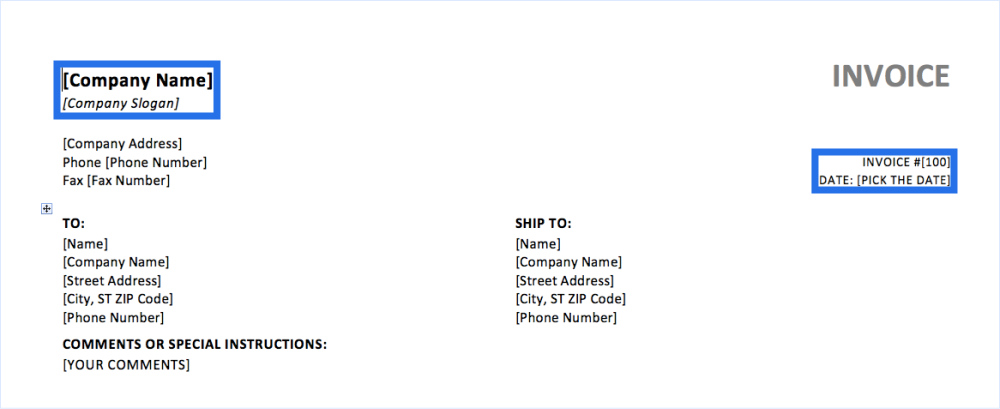
Invoice elements
Your Word invoice template must contain all the information your client will need, which are typical as follows:
The completed Invoice may differ depending on the type of business, so yours may include additional or fewer details than provided above. Then the invoice you create should be clear and detailed enough to showcase the services rendered, which will help them clear the payments at the earliest.
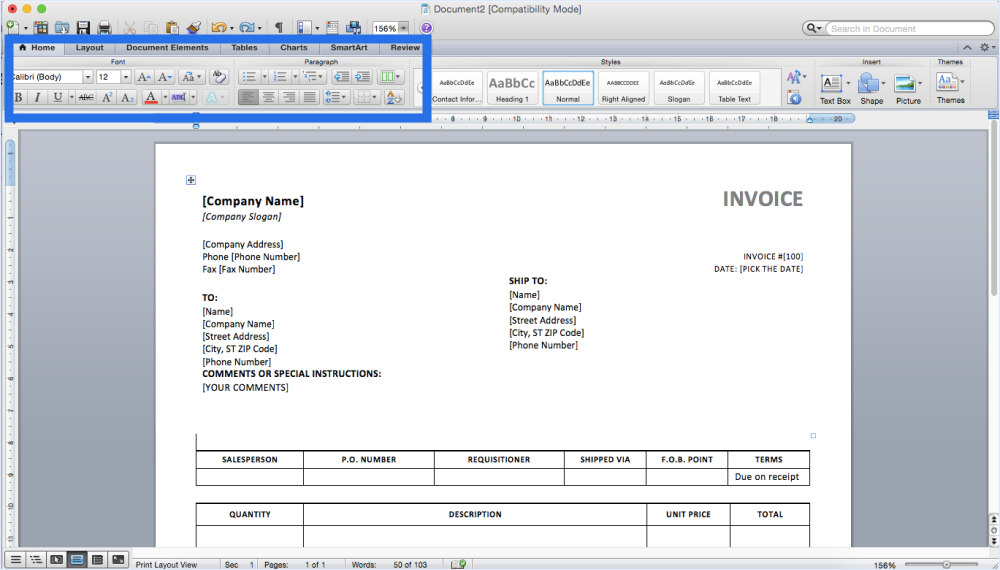
Step 3: Create a customized invoice
After you have downloaded your preferred invoice template and gathered the necessary information, the next step is customizing the invoice per your business and services.
Creating an official invoice template allows you to fill your invoice with your business information to make the invoicing process easier for future invoices. This reduces the time it takes to create an invoice every time your business information needs to be entered.
Make sure your template is saved in your system of document filing. Alternatively, you can label it "YourCompanyName_InvoiceTemplate" so it's easy to find.
Invoices are created by making a copy of the file, editing it to add the details necessary, and then sending them to the client. As a result, you'll always have an invoice template ready to use.
Redesign
The Word template can be modified to meet your business needs by removing, adding, or adjusting elements.
Put your logo
Adding your business logo to your invoice is very crucial, and it helps the client determine the business. Most of the invoice templates you can find in Word allow you to place a logo for your business as part of the invoice when using one of their templates.
Adding your business information
You can then add information about your business. Click on the space where you would like to add text, and then you can type it.
A border will be drawn around the text box to highlight it in Word. When you have selected, deleted the placeholder text, and typed in the text you wish to include, you can then click on Save.
You will likely include the following information on your invoice as part of your business information:
- Name of the business
- Name of your company
- Address of the business
- Email or phone number of the business
Creating new Word invoice templates will require you to complete this step before you can save the invoice for later use.
Add the client's information
In the next step, you'll need to provide information about your client, and it is necessary to include their names, addresses, and phone numbers.
Adding a list of items for services or products
A grid of lines should appear on a large portion of the invoice—where you can key in the goods or services you provided. There should already be a mutually agreed-upon construction contract between you and the client on the fee.
Costs are added
The next step is to add the cost of each of your services and products. Each line item should have a cost.
The total cost
Now is the time to total the cost. Using the total amount, you can estimate how much you expect to be paid by the client.
Step 4: Check to see if any information is missing
Every invoice will likely be slightly different, and what you need to include in the invoice will be specific to your business.
So you must consider what information you need to provide for your customer to understand what they are paying you for and what they need to do to settle the invoice.
Word templates may not contain all the boxes you need for everything you want to include on your invoice, so you may need to customize your invoice template accordingly. Be sure you have included everything your client needs to know before saving your invoice.
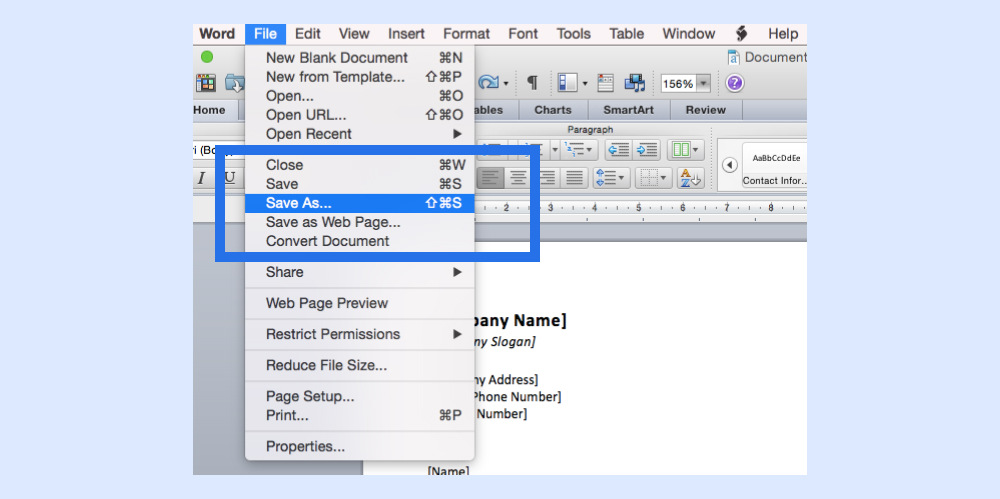
Step 5: Save the PDF file
You should save your digital invoice as a PDF before sending it to a client.
Navigate to "File," select "Save As," then rename the file within your naming conventions, and select "PDF" as the file type.
If you want no one can edit your invoice, you will need to save it as a PDF as PDFs cannot be directly edited. In this way, you can make sure your client sees the same document as you do, and they cannot make any changes to it without consulting you.
Step 6: Send the invoice
Now that your invoice is complete, you can send it to your client. It can be sent via email or regular mail or be handed to them in person, and it is entirely up to you how you choose to send it.
To gain a step-by-step understanding of how to create an invoice in Microsft Word, you should watch this informative video
How to Make an Invoice in Word from Scratch
If templates aren't your preferred choice or you need a custom design for your invoice, you can create one from scratch in Microsoft Word. By creating your invoice from scratch, you gain full control over its design, allowing you to tailor it to your brand and business needs.
Here's a step-by-step guide to help you create a professional-looking invoice manually:
Step 1: Open a blank document
Launch Microsoft Word and open a blank document to start with a clean slate.

Step 2: Set up your document
Adjust the page layout by navigating to the "Layout" tab. Set margins, orientation, and paper size to suit your needs. For a standard invoice, use the portrait orientation and standard letter size.
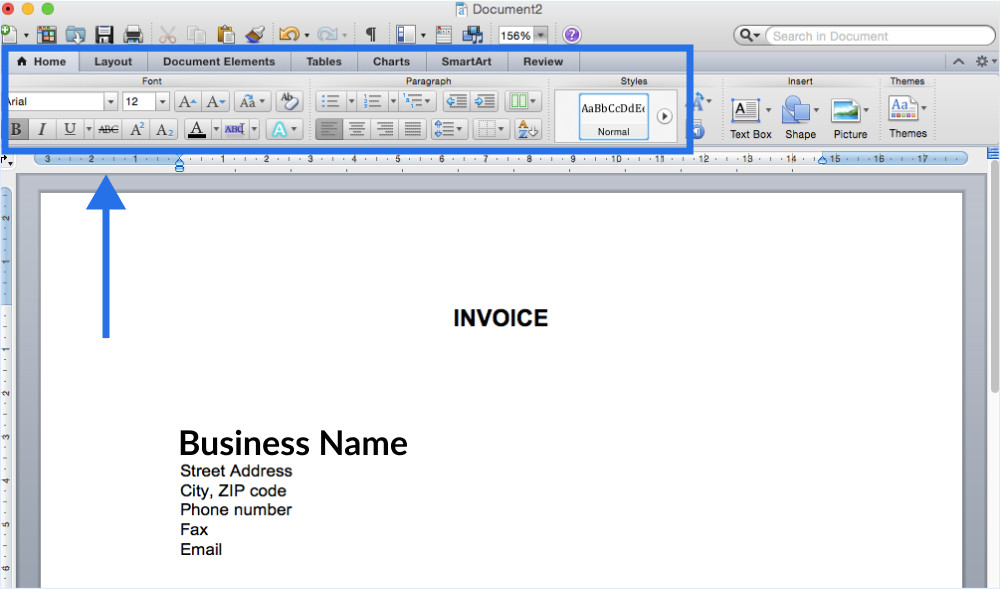
Step 3: Add a header
Create a header for your invoice by typing your business name, logo, and contact information. Use the Insert tab to add your logo as an image and format it using Word's image tools.
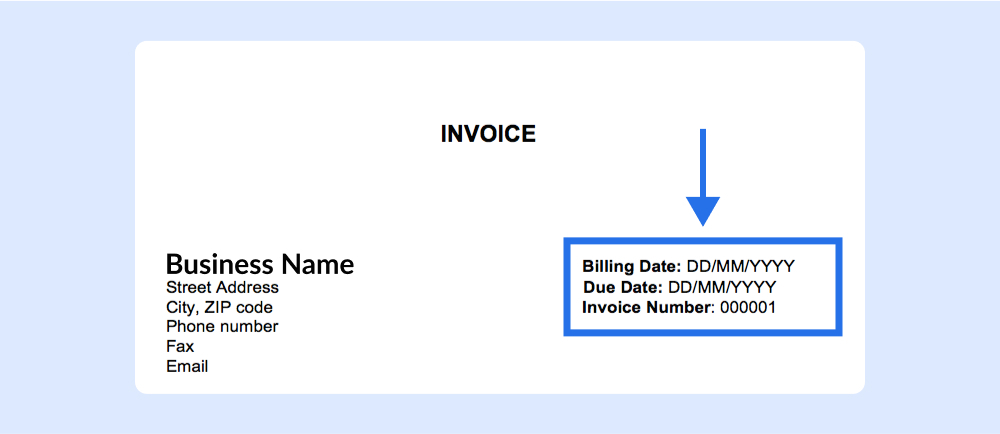
Step 4: Add invoice details
Beneath the header, include the following essential information:
- Invoice Number
- Invoice Date
- Due Date
- Client's Name and Contact Information
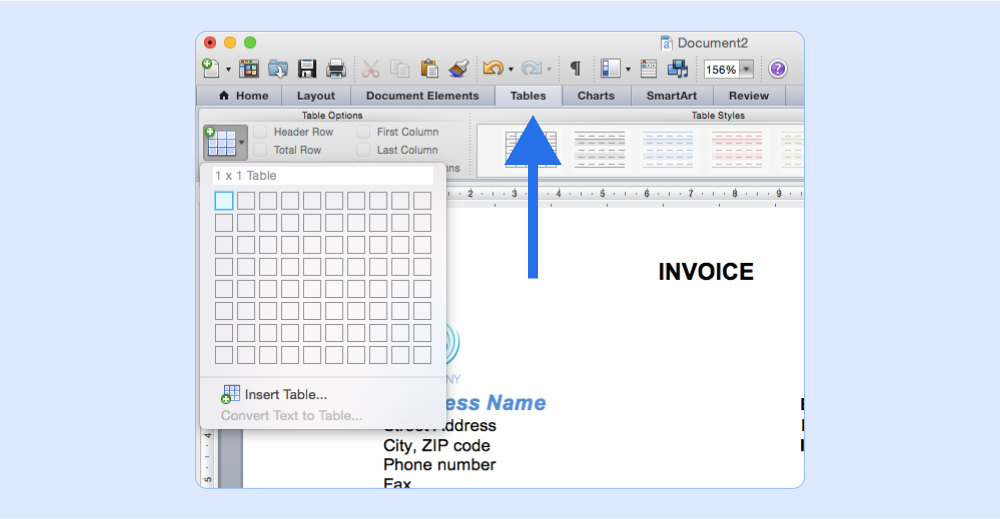
Step 5: Create a table for line items
Use the Insert tab to add a table. Structure it with columns for:
- Item/Service Description
- Quantity
- Unit Price
- Total
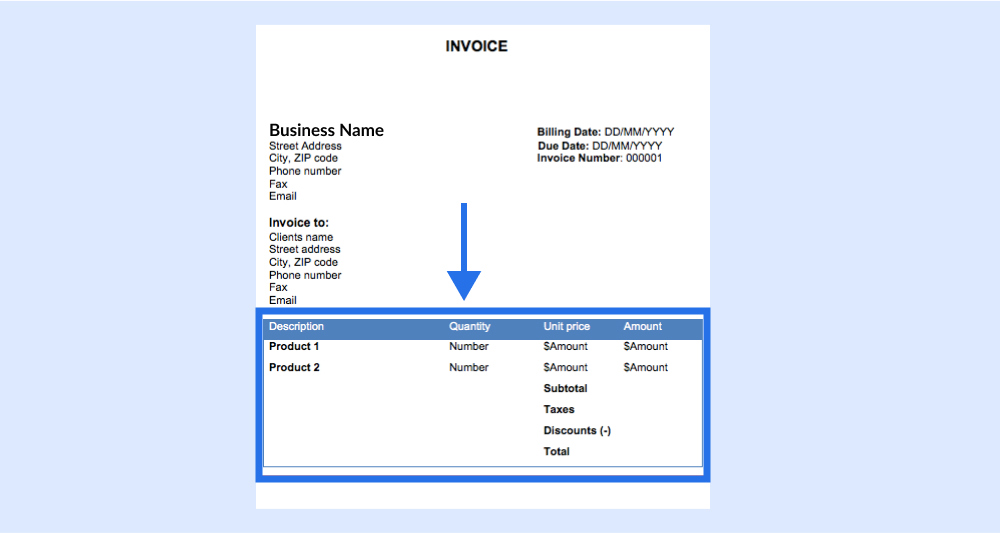
Input the details of the goods or services provided, and calculate the total for each row.
Step 6: Calculate totals
Add a Subtotal row at the bottom of your table, followed by a Tax row (if applicable), and finally a Grand Total row. Ensure the totals are accurate.
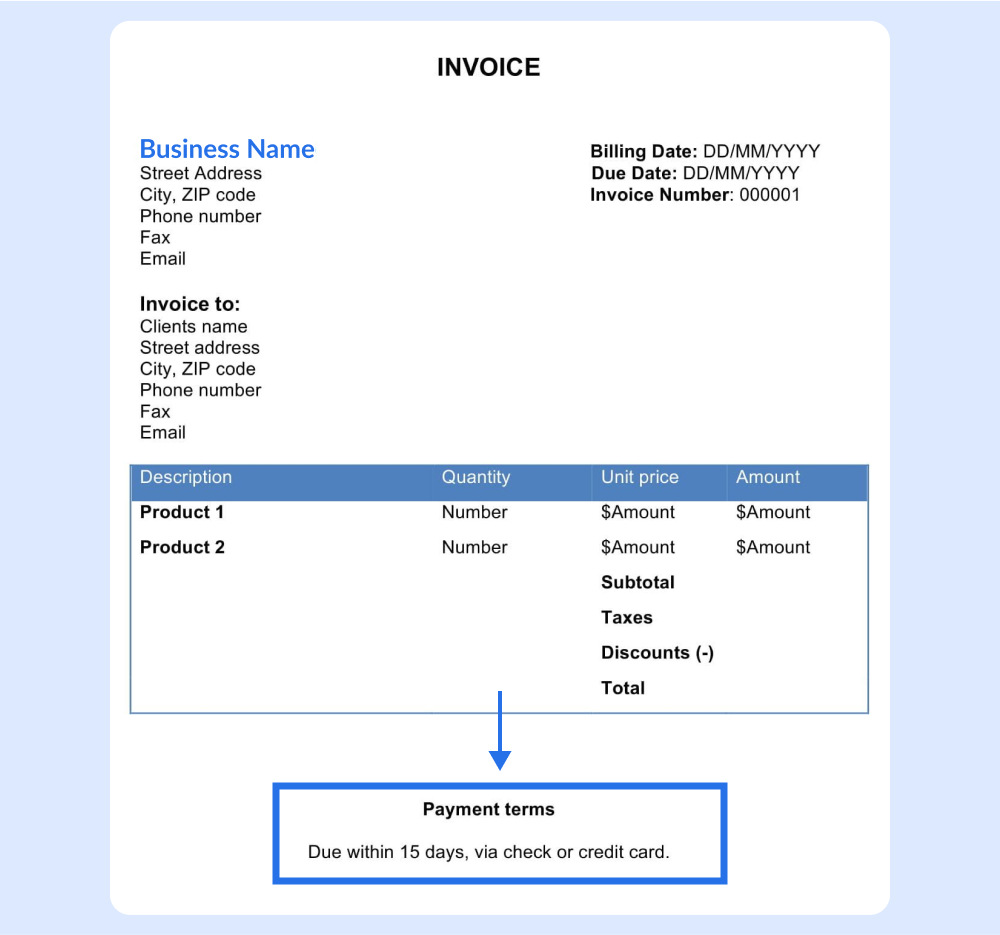
Step 7: Include payment terms
At the bottom of the document, clearly state your payment terms, including the preferred payment methods and due date. You can also add a thank-you note for your client's business.
Step 8: Review and save as pdf
Proofread your invoice for accuracy and professionalism. Once satisfied, save the document as a PDF to ensure it remains uneditable when shared with clients.
Save your customized invoice as a template file so you can reuse it for future invoices. This saves time and ensures consistency across all your billing documents.
Tips to Create a Good Invoice
Whenever you create an invoice in Word, you want to ensure your customers understand the document and find it helpful. So when creating these documents, remember these tips to ensure they are the best.
- Provide all information: The invoice is supposed to be specific and necessarily informative. It should contain specific information that you, as the business owner and the recipient of the invoice, will need to know.
- Carefully craft the invoice: Invoices are essential to your small business's brand and leave a lasting impression on your clients. There may be a learning curve when you first learn how to make an invoice in Word. There is no need to worry about creating a complex invoice when you have a template in Word that makes the process a lot easier.
- Share your invoice on time: Always ensure that your clients receive invoices from you on time. You'll typically send an invoice when the product is delivered, or the work is completed. To ensure that you are on the same page, you will have to make the decision with the client before you start working on the project.
Advantages and Disadvantages of Using Word Invoices
Deciding if Microsoft Word is the right invoicing solution for your business demands a deeper analysis of its capabilities. Here are a few pros and cons listed that will help you make an informed decision.
Word Invoices: Pros vs Cons
| Pros | Cons |
|---|---|
| Customizable options to match your brand and preferences | Time-consuming without automation for each new invoice |
| Completely free templates available from multiple sources | Risk of human error with manual data entry |
| User-friendly interface with gentle learning curve | Limited customization capabilities in older Word versions |
| Easy to share and export as PDFs or different file formats | Harder to track invoice status and payment follow-ups |
| Supports calculations, formulas, and professional formatting | Cannot accept online payments within the document |
Can't accept online payments? Unlike InvoiceOwl and other invoicing platforms that accept payment online, Word invoices have to be paid manually outside the document creation process itself.
Creating an Invoice with Invoicing Software
An invoicing software like InvoiceOwl makes it easy to create professional invoices in just a few clicks.
With InvoiceOwl, you can customize numerous free premade invoice templates with your business branding, including logos, signatures, fonts, and more.
To create an invoice, visit the InvoiceOwl website, head to invoice generator, select your favorite template, then customize it by entering the necessary information.
That's it! This is how you can automate your invoicing process with InvoiceOwl.
The software is easy to access from anywhere, anytime, using your mobile device, tablet, or PC. You can try a free trial to find out what it offers.
Avoid Back and Forth in Clearing Invoices With InvoiceOwl
InvoiceOwl is here to help you create professional estimates and invoices to help you win more jobs and get paid faster.
Start Your FREE TrialConclusion
You will realize how simple it is to put together an invoice once you learn how to create one in Word and include all of the information you and your client need in a service invoices. Making a professional-looking invoice with Word gives you something valuable and easy to keep track of, which can significantly ease your life as a business owner.
Frequently Asked Questions
Yes, there is. Launch Microsoft Word. Choose File > New. In the search bar, enter invoice and search field in Word will display all free Word invoice templates. On the homepage of Office Online, you will find a series of templates.
To create an invoice, start with including your business name, contact info, and a unique invoice number. Next come the client's details, so add the necssary elements, such as invoice date, due date, and a breakdown of services or products with prices. Display the total amount due, including taxes if applicable. Finally, if you have a set of terms to follow, provide payment instructions like a remittance address or bank details for client.
It is worth mentioning that Microsoft Word also contains a few free templates. There are many available invoice templates to choose from, and you can find them by choosing File > New and searching for a template that suits your needs.